github.com/Doodream/NativeProject
Doodream/NativeProject
React Native를 연습하는 앱 입니다. Contribute to Doodream/NativeProject development by creating an account on GitHub.
github.com
expo.io/@doodream/projects/NativeProject
NativeProject on Expo
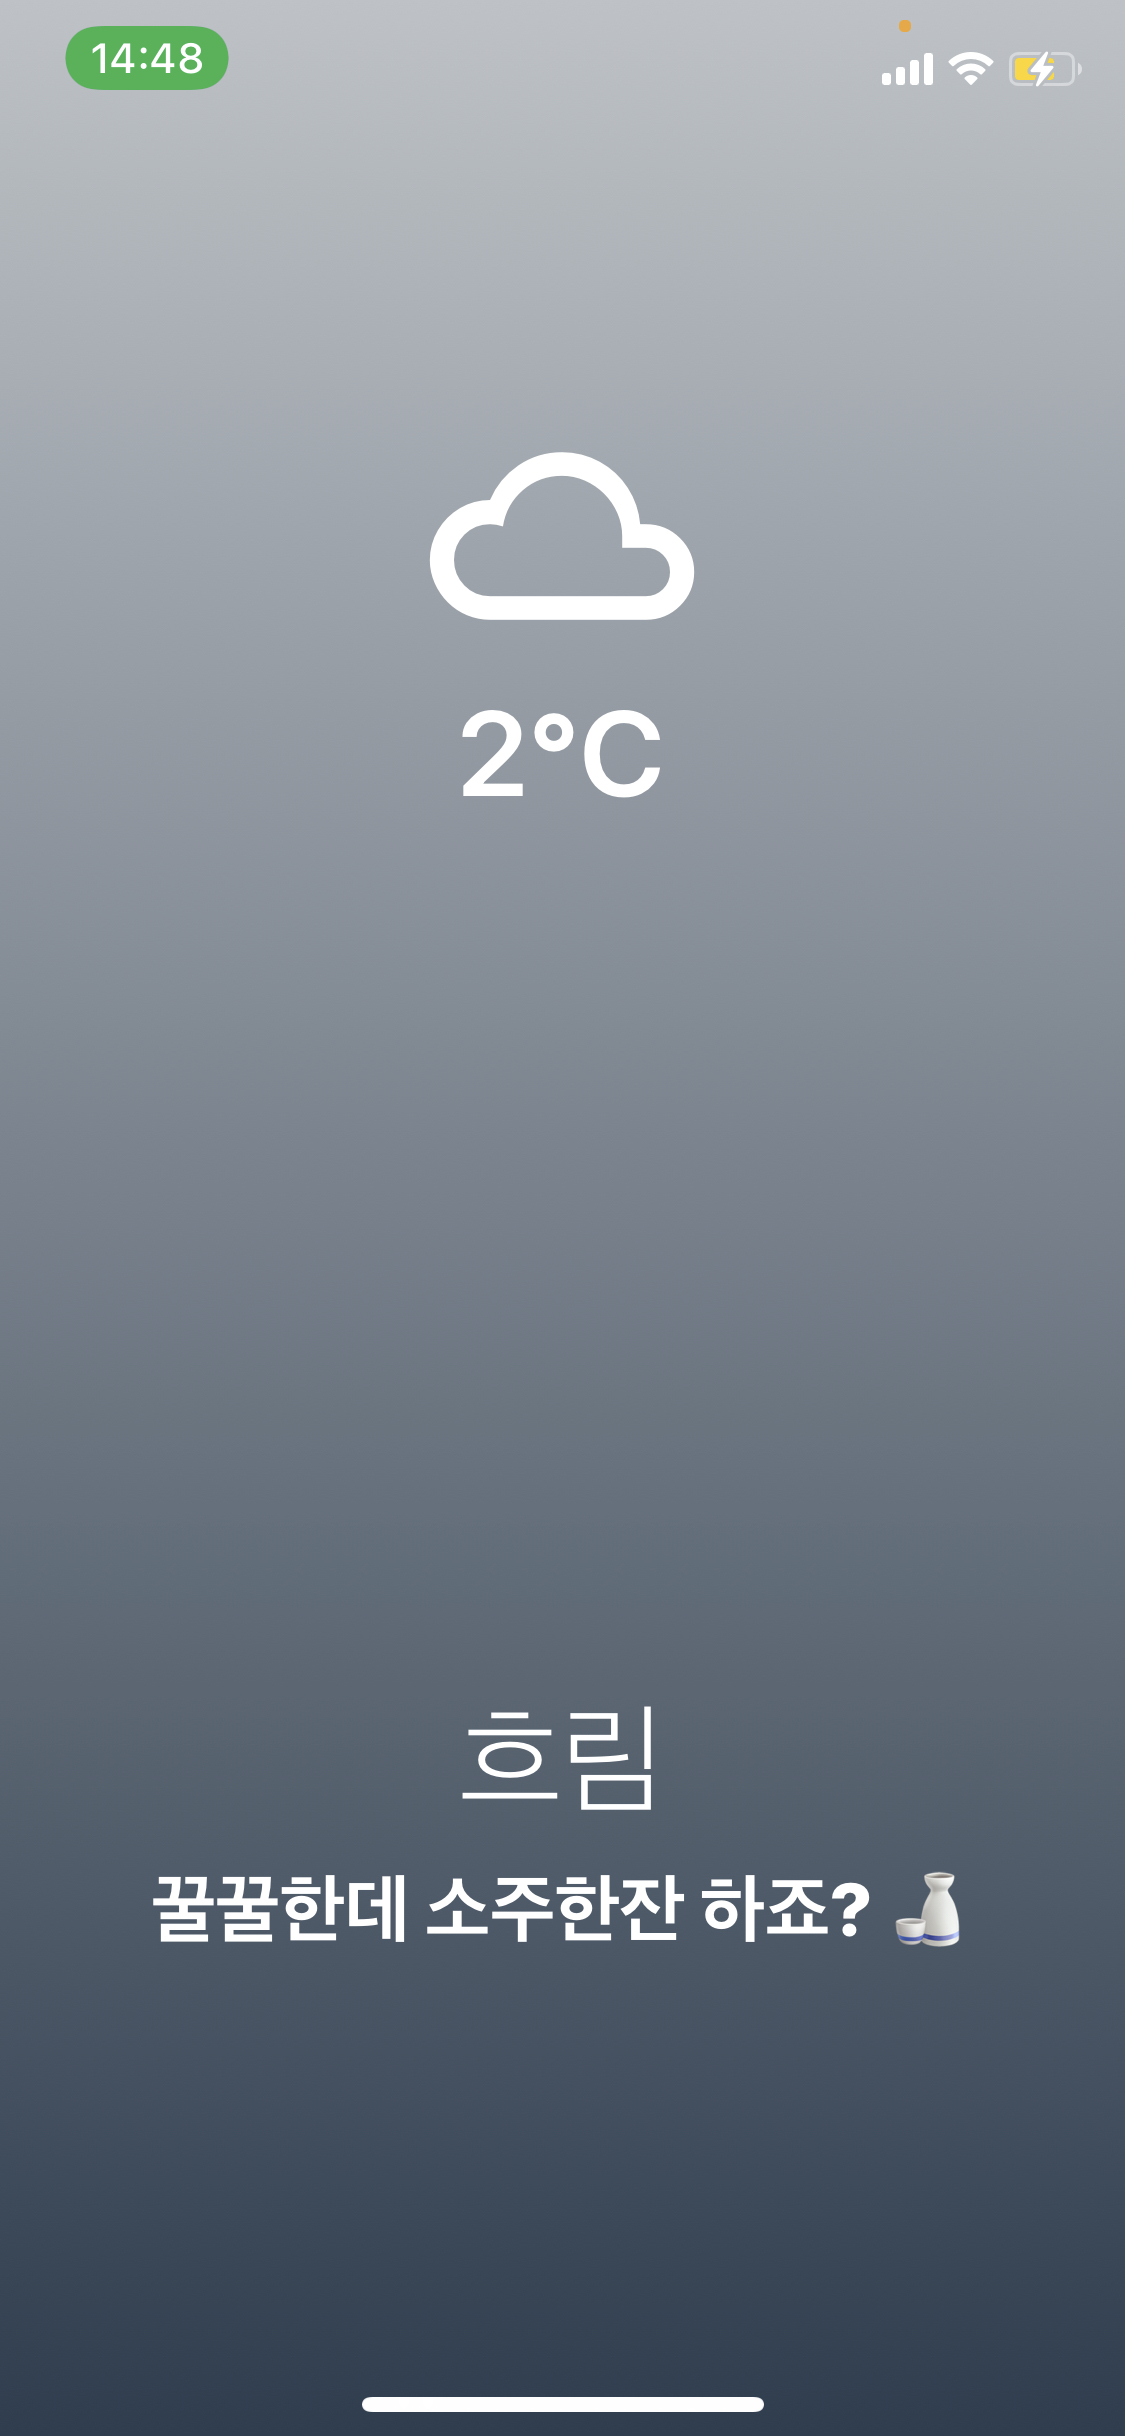
현재 날씨와 온도를 알려주는 앱입니다.
expo.io

어플소개
현재 위치의 경도와 위도를 받아서 openweather api에 넘기면 해당 api가
날씨 정보를 반환한다. 우리는 해당하는 날씨 정보를 받아서 날씨에 따른 정보를
화면에 출력해준다.
- reactNative를 이용해서 개발되었다.
사용된 패키지들은 다음과 같다.
"axios": "^0.21.0",
- url로 api에 정보를 보내서 데이터를 가져오기 위해서
"expo": "~39.0.2",
"expo-linear-gradient": "~8.3.0",
- 그라데이션을 넣기 위해서
"expo-location": "~9.0.0",
- 현재 위치의 경도와 위도를 얻기 위해, 해당기기에 gps사용을 허가 받기 위해
"expo-status-bar": "~1.0.2",
- 해당 기기의 맨 상위의 상태바의 상태를 정하기 위해서
"prop-types": "^15.7.2",
- 컴포넌트에 넘길 값들이 제대로 맞은 타입의 값들을 받았는지
"react": "16.13.1",
"react-dom": "16.13.1",
"react-native": "https://github.com/expo/react-native/archive/sdk-39.0.4.tar.gz",
"react-native-web": "~0.13.12"
핵심코드
App.js
import React from 'react';
import Loading from './Loading';
import * as Location from 'expo-location';
import { Alert } from 'react-native';
import axios from 'axios';
import Weather from './Weather';

const API_KEY = "f406068e2da6f326fda5ffd53c6500f4";

export default class App extends React.Component {
  state = {
    isLoading: true
  };

  getWeather = async(latitude, longitude) => {
    const { data:{main, weather} } = await axios.get(
      `https://api.openweathermap.org/data/2.5/weather?lat=${latitude}&lon=${longitude}&appid=${API_KEY}&units=metric`
    );
    this.setState({temp: main.temp, weather: weather[0].main , isLoading : false});
  }


  getLocation = async() =>{
    try{
      await Location.requestPermissionsAsync();
      const {coords : {latitude, longitude}} = await Location.getCurrentPositionAsync();
      this.getWeather(latitude, longitude);
    } catch{
      Alert.alert("Can't find you", "i'm so sorry");
    }

  };
  componentDidMount(){
    this.getLocation();
  };
  render (){
    const{ isLoading, temp, weather } = this.state;
    return (
      isLoading ? <Loading /> : <Weather temp = {temp} weather = {weather}/>
    );
  };
}
- class 형태의 컴포넌트로서 state를 가지고 있다.
- 처음 App.js가 랜더링 되면 컴포넌트의 life cycle 생성주기에 의해서 componentDidMount가 실행되고
getLocation 함수가 실행된다.
비동기형태로 Location 패키지속에 requestPermissionAsync()함수가 해당기기에 gps접속을 허락받고
getCurrentPositionAsync()함수가 현재위치의 정보를 반환하면 coords: 항목의 latitude와 longitude 항목만 저장한다.
보통함수끝에 Async이 붙어있으면 비동기식으로 async과 await를 이용해서 함수를 불러내야 하는 것같다.
이후 getWeather 함수에 위도와 경도를 넘기면 axios로 url에 위도와 경도 apikey값을 넘겨서 data항목의 main과 weather부분만
받아온다. 그리고 온도와 날씨정보를 받아서 setState로 state를 최신화한다.
이후 render()함수에서 최신화된 state정보를 Weather 컴포넌트로 넘긴다.
Weather.js
import React from 'react';
import { StyleSheet, Text, View } from 'react-native';
import PropTypes from 'prop-types';
import { MaterialCommunityIcons } from '@expo/vector-icons';
import { LinearGradient } from 'expo-linear-gradient';
import { StatusBar } from 'expo-status-bar';


const weatherOption = {
    Thunderstorm:{
        iconName: "weather-lightning",
        gradient: ["black","yellow"],
        title: "천둥번개",
        subtitle: "밖에 나가지 마세요 😱",
    },
    Rain: {
        iconName: "weather-rainy",
        gradient: ["#373B44","#4286f4"],
        title: "비",
        subtitle: "우산을 챙겨 나가세요. ☂️",
    },
    Snow: {
        iconName: "weather-snowy",
        gradient: ["#ADA996","#EAEAEA"],
        title: "눈",
        subtitle: "펄펄 눈이 내려와요 ❄️ ",
    },
    Haze: {
        iconName: "weather-hazy",
        gradient: ["#BE93C5","#7BC6CC"],
        title: "안개",
        subtitle: "안개가 자욱해요 🌫",
    },
    Fog: {
        iconName: "weather-fog",
        gradient: ["#bdc3c7","#2c3e50"],
        title: "짙은 안개",
        subtitle: "짙은 안개속 산신령이 나타날지도..?",
    },
    Tornado: {
        iconName: "weather-tornado",
        gradient: ["#16222A","#3A6073"],
        title: "토네이도",
        subtitle: "용오름이 오네요! 🐉",
    },
    Clear: {
        iconName: "weather-sunny",
        gradient: ["#2980B9","#FFFFFF"],
        title: "맑음",
        subtitle: "언제봐도 좋은 날씨에요 ☀︎",
    },
    Clouds: {
        iconName: "weather-cloudy",
        gradient: ["#bdc3c7","#2c3e50"],
        title: "흐림",
        subtitle: "꿀꿀한데 소주한잔 하죠? 🍶",
    },
}

export default function Weather({temp, weather}){
    return (
        <LinearGradient colors={weatherOption[weather].gradient} style={useStyles.container}>
            <StatusBar barstyle = "light-content" />
            <View style={useStyles.halfContainer}>
                <MaterialCommunityIcons name={weatherOption[weather].iconName} size={96} color="white" />
                <Text style={useStyles.temp}>{Math.round(temp)}℃</Text>
            </View>
            <View style={useStyles.halfContainer}>
                <Text style={useStyles.title}>{weatherOption[weather].title}</Text>
                <Text style={useStyles.subtitle}>{weatherOption[weather].subtitle}</Text>
            </View>
        </LinearGradient>
    );
}

const useStyles = StyleSheet.create({
    container:{
        flex: 1,
        justifyContent: "center",
        alignItems: "center"
    },
    halfContainer:{
        flex: 1,
        justifyContent: "center",
        alignItems: "center"
    },
    temp:{
        fontSize: 40,
        fontWeight: "600",
        color: "white"
    },
    title:{
        fontSize: 40,
        color: "white",
        marginBottom: 15,
        fontWeight: "200"
    },
    subtitle:{
        fontSize: 25,
        color: "white",
        fontWeight: "800"

    }
})

Weather.propTypes = {
    temp: PropTypes.number.isRequired,
    weather: PropTypes.oneOf([
        "Thunderstorm",
        "Rain",
        "Snow",
        "Haze",
        "Fog",
        "Tornado",
        "Clear",
        "Clouds"
    ]).isRequired
};
- propTypes로 해당하는 내용이 형식에 맞는지 거른다음에 weatherOption이라는 배열을 만들어서
상황에 따른 정보를 받는다.
- StyleSheet, Text, View로 reactNative를 꾸민다음에
- 보여지는 구현은 @expo/vector-icons 패키지를 이용해서 아이콘들을 찾고 해당 아이콘의 이름을
그대로 View에 넣고 마찬가지로
- expo-linear-gradient 패키지를 이용해서 그라데이션을 줄 색을 넣은다음 배경에 해당 색을 넣는다.
굉장히 별거 아닌 구현이지만 도움되는 클론 코딩이었다.
'Projects' 카테고리의 다른 글
| React 기초 : 영화 소개 리스트 (0) | 2020.11.18 |
|---|---|
| 졸업작품 - 2017 [미소트레이닝 앱] (0) | 2020.11.03 |
| kokoa-clone 클론코딩 배포 (0) | 2020.10.12 |

